掛載 WSL2 的目錄到 Podman 中
TL;DR
cat <<-EOF | sudo tee /etc/systemd/system/mnt-wsl-instances-${WSL_DISTRO_NAME}.mount
[Unit]
Description=WSL Instances

[Mount]
What=/
Where=/mnt/wsl/instances/${WSL_DISTRO_NAME}
Type=none
Options=defaults,bind,X-mount.mkdir

[Install]
WantedBy=multi-user.target
EOF
sudo systemctl daemon-reload
sudo systemctl enable --now mnt-wsl-instances-${WSL_DISTRO_NAME}.mount
podman-remote run \
  -v /mnt/wsl/instances/${WSL_DISTRO_NAME}/`pwd`:/app \
  docker.io/library/busybox ls /app
前情提要
Podman[1] 是一個由 Redhat[2] 主推的 Container[3] 工具,如果有用過容器的讀者們應該對於與其類似的 Docker[4] 不陌生,Podman 就是一個這樣的容器管理工具。
與 Docker 不同的是,Podman 另外引入了 Pod[5] 的概念,以及具有預設支援 rootless 及去 daemon 化等特色。
Podman Desktop
Podman 團隊在各平臺上推出了桌面管理工具 —— Podman Desktop[6],類似於 Docker Desktop 提供視覺化的管理功能外,也能協助使用者安裝 Podman 至系統中並提供各種設定及擴充功能。
有興趣從 Docker 跳船的讀者可以參考 Podman Desktop 提供的跳船指南: https://podman-desktop.io/docs/migrating-from-docker
Windows 下的 Podman
在 Windows 上,Podman 會在 Windows 中安裝 podman.exe,協助你在 Host 的 Command line 中輕鬆存取 Podman,例如我們可以打開一個 PowerShell(或 CMD),執行 podman version,即可看到類似下方截圖的結果:

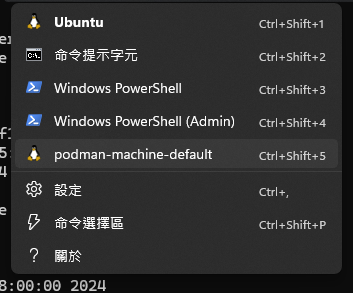
大家可以注意到,雖然我們可以在 Windows 下面執行 Podman 指令,但實際上的 Podman Engine 卻是執行在 Linux 上的,這是因為 Podman 目前只能管理 Linux Container,因此 Podman 決定將 Podman Engine 跑在 WSL2 中,如果有安裝 Windows Terminal 的話,可以從自動產生的下拉選單中發現一個新的 WSL2 的 Distro。
並且 Podman 會幫你做好與 Windows Host 的整合,例如可以直接掛載 Windows 的目錄或檔案進容器中,例如:
PS C:\Users\Davy\podman-test> echo "Hi Podman from Windows" > hello.txt
PS C:\Users\Davy\podman-test> podman run --rm -v .\hello.txt:/hello.txt docker.io/library/busybox cat /hello.txt
Trying to pull docker.io/library/busybox:latest...
Getting image source signatures
Copying blob sha256:ec562eabd705d25bfea8c8d79e4610775e375524af00552fe871d3338261563c
Copying config sha256:65ad0d468eb1c558bf7f4e64e790f586e9eda649ee9f130cd0e835b292bbc5ac
Writing manifest to image destination
��Hi Podman from Windows
PS C:\Users\Davy\podman-test>
(請忽略那兩個看不見的 BOM 符號……)
也就是說,我們可以隨意地編寫 PowerShell 腳本(或 CMD 批次檔)來操作 Podman!😏
WSL2 下的 Podman
那麼,通常會使用 Podman 的話,應該會對 WSL2[7] 也不陌生吧!
於是,我們可能會想,既然 Windows Host 都能如此順暢地與 WSL2 中的 Podman 整合了,那麼原本就在 WSL2 的其他 Distro 應該可以更好地整合吧……嗎?
很可惜,Podman Desktop 只丟了一個頁面[8]告訴你,你要自己整合。
整合方式大致就是在 WSL2 中安裝一個 Podman,並將 podman-machine-default 提供的 Podman socket 接上這個 Podman,方法如下:
安裝 Podman / Podman Remote
Podman Desktop 推薦安裝 podman-remote[9] 作為你在 WSL2 中使用的 Podman CLI,安裝方式也很簡單,到 containers/podman 的 Release 頁面中下載適合的 podman-remote 執行檔後放入 $PATH(例如 /usr/local/bin 或 /usr/bin) 中,並將 podman alias 成 podman-remote 或直接 ln -s podman-remote podman。
接下來就可以嘗試在 WSL2 中執行看看 podman(或 podman-remote)了!
$ podman-remote ps
Cannot connect to Podman. Please verify your connection to the Linux system using `podman system connection list`, or try `podman machine init` and `podman machine start` to manage a new Linux VM
Error: unable to connect to Podman socket: Get "http://d/v5.1.2/libpod/_ping": dial unix /mnt/wsl/podman/podman-machine-default.socket: connect: connection refused
咦?為什麼不會動呢? 啊,原來是忘記將 podman-remote 與 podman-machine-default 中的 Podman 連結在一起了,還需要下面的設定才行:
$ podman-remote system connection add --default \
  podman-machine-default-root \
  unix:///mnt/wsl/podman-sockets/podman-machine-default/podman-root.sock
# usermod --append --groups 10 $(whoami)
設定完成之後重新登入 Shell(或重新打開一個新的 Terminal),再執行一次 podman-remote 看看:
$ podman-remote ps
CONTAINER ID  IMAGE       COMMAND     CREATED     STATUS      PORTS       NAMES
$ podman-remote run --rm quay.io/podman/hello
Trying to pull quay.io/podman/hello:latest...
Getting image source signatures
Copying blob sha256:81df7ff16254ed9756e27c8de9ceb02a9568228fccadbf080f41cc5eb5118a44
Copying config sha256:5dd467fce50b56951185da365b5feee75409968cbab5767b9b59e325fb2ecbc0
Writing manifest to image destination
!... Hello Podman World ...!

         .--"--.
       / -     - \
      / (O)   (O) \
   ~~~| -=(,Y,)=- |
    .---. /`  \   |~~
 ~/  o  o \~~~~.----. ~~
  | =(X)= |~  / (O (O) \
   ~~~~~~~  ~| =(Y_)=-  |
  ~~~~    ~~~|   U      |~~

Project:   https://github.com/containers/podman
Website:   https://podman.io
Desktop:   https://podman-desktop.io
Documents: https://docs.podman.io
YouTube:   https://youtube.com/@Podman
X/Twitter: @Podman_io
Mastodon:  @[email protected]
$
如此一來就可以在 WSL2 中操作與 Windows 摸到的同一個 Podman 了!
掛載 WSL2 中的路徑至 Podman
就算按照步驟將 WSL2 與 Podman 整合起來之後,你還會發現一些小小小問題 —— 例如掛載不到 WSL2 中的目錄……
~/podman-example$ echo "Hello from WSL2" > hello.txt
~/podman-example$ cat `pwd`/hello.txt
Hello from WSL2
~/podman-example$ podman-remote run --rm \
  -v `pwd`/hello.txt:/hello.txt \
  docker.io/library/busybox \
  cat /hello.txt
Error: statfs /home/davy/podman-example/hello.txt: no such file or directory
~/podman-example$
咦? 奇怪? 為什麼他會跟我說這個測試用的檔案不存在,明明直接 cat 會動的呀……
而且在 Docker 裡面如果這樣子做的話是會動的,為什麼在 Podman 中不行呢?
原來是在 Docker Desktop 中,對於掛載 WSL2 Distro 中的路徑時,Docker 會轉而向一個輔助工具求助,這個工具會協助 Docker 存取其他 WSL2 中的資料[10]。因為 WSL2 中各個 Distro 的資料是各自獨立的,所以 Docker/Podman 的 WSL2 預設沒有辦法直接存取其他 Distro 的資料,此時會導致掛載路徑時會只能在自己的 WSL2 中搜尋,我們可以來做個實驗:
我們嘗試將 /home 掛載到 Podman container 中,在此之前我們先來確認在兩個 WSL2 中的檔案狀態:
user@podman-machine-default:~ $ ls /home/
user

davy@Ubuntu:~ $ ls /home/
davy
接下來我們開始嘗試掛載:
davy@Ubuntu:~ $ podman-remote run --rm -v /home/:/the-home docker.io/library/busybox ls /the-home
user
davy@Ubuntu:~ $
可以看到,podman-remote 將 podman-machine-default 中的 /home 掛載到了容器中,而非我們期望的 WSL2 Distro 中的 /home。
也就是說,--volume/-v 參數,不論在那個 WSL2 Distro,對應到的都是 podman-machine-default 中的路徑。
那麼,我們該如何掛載 WSL2 中其他 Distro 的路徑呢?
WSL2 的神奇共用目錄
在 WSL2 中,有一個神祕的路徑是全 WSL2 Distro 共享的,那就是 /mnt/wsl,Podman 也是藉由將 Podman Engine 的 socket 放在這個地方來讓其他 Distro 可以存取[11]。WSL2 將這個神奇目錄用在存放與全 Distro 共享的設定等資料,大家可以嘗試下面的指令:
$ ls -l /etc/resolv.conf
lrwxrwxrwx 1 root root 20 Jul 17 22:11 /etc/resolv.conf -> /mnt/wsl/resolv.conf
$ ls -l /mnt/wsl/resolv.conf
-rw-r--r-- 1 root root 213 Jul 13 09:12 /mnt/wsl/resolv.conf
$ cat /mnt/wsl/resolv.conf
# This file was automatically generated by WSL. To stop automatic generation of this file, add the following entry to /etc/wsl.conf:
# [network]
# generateResolvConf = false
nameserver 10.255.255.254
search local
$
可以看到其實所有 Distro 的 /etc/resolv.conf[12],都是指向 /mnt/wsl/resolv.conf,而這個檔案會被 WSL2 自動地更新,WSL2 藉由這個方式來讓所有的 Distro 共用相同的設定。
於是,我們可以透過這個神奇的小地方來把我們要分享的東西放在這裡,再讓 podman-machine-default 來這裡存取即可!
解決方案
既然知道了方法,那麼我們就往下來執行,最簡單的方式就是利用 mount 指令將 WSL2 各個 Distro 的根目錄分享到 /mnt/wsl 下面,如此一來 podman-machine-default 就可以存取到裡面的內容了![13]
$ echo $WSL_DISTRO_NAME
Ubuntu
# mount -t bind -o defaults,bind,X-mount.mkdir / /mnt/wsl/instances/${WSL_DISTRO_NAME}
$ ls /mnt/wsl/instances/
Ubuntu
$ ls /mnt/wsl/instances/Ubuntu/home/
davy
$ podman-remote run --rm \
  -v /mnt/wsl/instances/${WSL_DISTRO_NAME}`pwd`/hello.txt:/hello.txt \
  docker.io/library/busybox \
  cat /hello.txt
Hello from WSL2
$
終於成功啦!🎉
systemd.mount
目前主流版本的 WSL2 引擎都已經支援 systemd[14][15] 了,於是我們可以再多做一點事情 —— 自動掛載。
由於前面我們是手動使用 mount 指令來進行掛載,在每次 WSL2 重新啓動的時候都會復原,因此我們希望在 WSL2 啓動的時候就幫我們把這個 mountpoint 掛載上去,我們可以透過 systemd.mount 來幫我們完成這個任務。
在 /etc/systemd/system/ 下建立一個新的檔案 mnt-wsl-instances-${WSL_DISTRO_NAME}.mount,內容如下(此例中以 Ubuntu 取代 ${WSL_DISTRO_NAME},請讀者自行依照自己的環境作更換):
[Unit]
Description=WSL Instances

[Mount]
What=/
Where=/mnt/wsl/instances/${WSL_DISTRO_NAME}
Type=none
Options=defaults,bind,X-mount.mkdir

[Install]
WantedBy=multi-user.target
接下來執行下列指令來啓用這個 mount:
# umount /mnt/wsl/instances/${WSL_DISTRO_NAME}
$ ls /mnt/wsl/instances/${WSL_DISTRO_NAME}

# systemctl daemon-reload
# systemctl enable --now mnt-wsl-instances-${WSL_DISTRO_NAME}.mount
Created symlink /etc/systemd/system/multi-user.target.wants/mnt-wsl-instances-Ubuntu.mount → /etc/systemd/system/mnt-wsl-instances-Ubuntu.mount.
$ ls /mnt/wsl/instances/Ubuntu/home/
davy
$
這次終於是大功告成了!🎊
結語
其實原本不是要寫 Podman 相關的內容的…… 但剛好遇到要使用 Podman 的情景就想說順便把這件事情寫下來好了,原本是打算之後再跟大家分享的,現在提前先分享給大家 :)
Podman 在環境整合這方面真的還沒有做的 Docker 好,但還算在能搞懂原理的情況下自行 Hack,使用上或許沒有這麼方便,不過我個人還是覺得 Podman 還算是好用且方便的。
詳見官方網站: https://podman.io/ ↩︎
亦稱紅帽,主力開發及維護開源生態的軟體公司,其發行的 Redhat Enterprise Linux 常用於各種生產環境,詳見其官方網站: https://www.redhat.com/ ↩︎
此處專指 Linux Container,可參見維基百科《Containerization》條目 ↩︎
容器管理工具,詳見其官方網站: https://www.docker.com/ ↩︎
先出現與 Kubernetes 中的概念,為一組運算資源的最小管理單位,包含網路、掛載點等,詳見 K8s 的概念說明 ↩︎
Podman 的桌面管理工具,詳見官方網站: https://podman-desktop.io/ ↩︎
Windows Subsystem Linux 2,一個深度整合 Linux 執行環境於 Windows 中的解決方案,設計說明請參閱: https://learn.microsoft.com/en-us/windows/wsl/compare-versions#whats-new-in-wsl-2 ↩︎
請見: https://podman-desktop.io/docs/podman/accessing-podman-from-another-wsl-instance ↩︎
僅有遠端操作 Podman Engine 功能的閹割版 Podman CLI,使用說明詳見: https://docs.podman.io/en/latest/markdown/podman-remote.1.html ↩︎
原文節錄 "To make bind-mounts a seamless experience, we introduced a docker api proxy similar to the one we use for enabling bind mounts of Windows files that translates paths relative to the user distro into a path to the same file accessible from the LinuxKit container.",全文請見 https://www.docker.com/blog/new-docker-desktop-wsl2-backend/ ↩︎
Podman 將 socket 放在
/mnt/wsl/podm an-sockets/podman-machine-default/podman-root.sock來與其他 Distro 共用 ↩︎Linux 中用來設定 DNS 資訊的設定檔,詳見
man 5 resolv.conf或這裡的存檔: https://man7.org/linux/man-pages/man5/resolv.conf.5.html ↩︎$WSL_DISTRO_NAME—— 此一環境變數會記錄當下環境的 WSL2 Distro 名稱 ↩︎在 WSL v0.67.6+ 中可以啓用
systemd,詳見官方部落格: https://devblogs.microsoft.com/commandline/systemd-support-is-now-available-in-wsl/ ↩︎"systemd is a suite of basic building blocks for a Linux system. It provides a system and service manager that runs as PID 1 and starts the rest of the system.",節錄自官方網站: https://systemd.io/ ↩︎